How to add Google AdSense to WordPress without coding (beginner guide)
📌 Key Points
The goal: Add Google AdSense to WordPress and earn passive income from traffic you already have — no coding.
The method: Three steps — sign up for AdSense, connect it with a free plugin like Site Kit by Google, and choose 1–2 smart ad placements per page.
The catch: Approval needs a live site, 15+ real posts, legal pages, and Search Console indexing. Too many ads hurt speed, SEO, and earnings.
If you want to add Google AdSense to WordPress but every guide throws “insert this script here” at you like you’re supposed to know what that means, this one’s different. I’ll show you how to do it with free plugins and zero code — the same no-fuss way I’d set it up on any beginner site.
Displaying ads is one of the simplest ways to earn a little passive income from traffic you’re already getting. But for a non-technical blogger, the setup can feel like a maze of scripts and placements. It isn’t, once someone shows you the three actual steps. So let’s turn your blog into something that earns quietly in the background, without touching a single line of code.
Table of Contents
What is Google AdSense?
Google AdSense is a program that shows ads on your WordPress site and pays you when visitors see or interact with them. It’s one of the most accessible ways to monetise blog traffic, and it tends to make sense once:
- You’re publishing regular, genuinely useful SEO content.
- You’re getting a steady flow of visitors (roughly 100+ a day is a comfortable starting point).
- You want a passive income stream layered on top of the work you’re already doing.
It won’t make you rich on its own, but as one piece of a wider income mix, it’s a sensible place to start.
Why the no-code method is the right call for beginners
You might wonder whether you’re missing something by avoiding the manual code route. You aren’t. The old way to add Google AdSense to WordPress meant copying a script from your AdSense dashboard and pasting it into your theme’s header file — and one wrong paste, or a theme update that wiped your edit, could break ads or even your layout.
The plugin method removes all of that risk. Site Kit and Advanced Ads insert and manage the code for you, keep it in place through theme changes, and give you a visual way to control placements. For a non-technical owner, that’s not a lesser option — it’s the safer, more durable one. You get the same result Google wants, without the fragile manual step that trips people up. So don’t feel you’re cutting a corner; you’re choosing the method that’s actually harder to break.
What you need before you add AdSense
Google is selective about who it approves, so get these in order first. Before you add Google AdSense to WordPress, make sure:
- Your site is live and public — not on localhost or behind a “coming soon” page.
- You have a body of original content (aim for at least 15+ real posts).
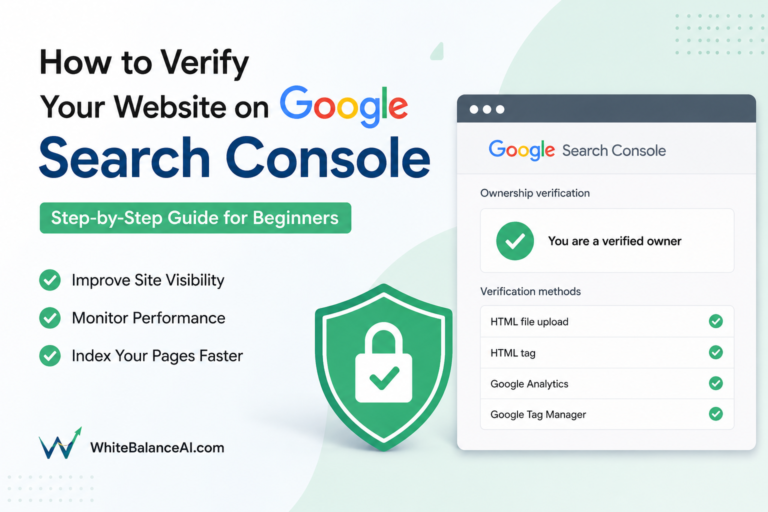
- Your blog is indexed in Google Search Console.
- You have the basic pages Google expects: About, Contact, and a Privacy Policy.
- You’re 18 or over and have a Google account.
Tick those off and your approval odds go up considerably. Skip them and rejection is likely. With that groundwork done, here are the three steps.
Step 1: Sign up for Google AdSense (free)
First, create your AdSense account:
- Go to the Google AdSense site and click Get Started.
- Sign in with your Google (Gmail) account.
- Enter your website URL, e.g.
whitebalanceai.com. - Choose your ad preferences — you can start with automatic placements.
- Submit your application.
Google typically takes anywhere from one to seven days to review your site, sometimes up to two weeks. Make sure the site looks clean and genuinely useful before you apply, because first impressions decide approvals here.
Step 2: Install a free AdSense plugin
To add Google AdSense to WordPress without coding, you connect your account using a plugin rather than pasting scripts by hand. Two good options:
Site Kit by Google (recommended for beginners). Built by Google itself, Site Kit shows AdSense, Analytics, and PageSpeed data right in your WordPress dashboard and handles ad placement for you.
- Go to Plugins → Add New and search “Site Kit by Google.”
- Install and activate it.
- Click Start Setup and connect your Google account.
- Enable AdSense inside Site Kit.
- Choose Let Site Kit place code, and you’re done — no manual scripts.
Advanced Ads (for more control). If you want to decide exactly where ads sit, especially inside your content, Advanced Ads gives you finer control.
- Install and activate the Advanced Ads plugin.
- Go to Advanced Ads → Settings → AdSense.
- Paste your AdSense Publisher ID (it starts with
ca-pub). - Choose your ad types: display, in-feed, or in-article.
- Use its auto-placement options or shortcodes to position them.
For most beginners, Site Kit is the cleaner choice. Reach for Advanced Ads once you want to fine-tune placements.
Step 3: Choose where your ads appear (no code)
With either plugin, you can place ads without touching code. Common spots include below the menu or header, in the sidebar, below each post, between paragraphs, and in the footer.
The temptation is to add as many as possible. Resist it. One or two well-placed ads per page almost always earns more, over time, than a cluttered page that drives readers away and drags down your speed and SEO. When you add Google AdSense to WordPress, restraint is genuinely the higher-earning strategy.


Where to place ads for the best results
Not all placements perform equally. These tend to work well for readers and revenue both:
- Below the blog title. High visibility on the first screen, before anyone scrolls away.
- After the second paragraph. A natural reading break, which tends to earn a healthy click-through rate.
- Sidebar widget. Stays visible as the reader scrolls (on desktop).
- Bottom of the post. Catches attention from readers who finished, which is bonus income.
Test a couple, watch your reports, and keep what performs. Don’t just switch on every placement at once.
How much can you actually earn from AdSense?
Let me be honest about this, because inflated income claims help nobody. AdSense earnings vary enormously and depend on:
- Your niche — tech and finance command higher cost-per-click than lifestyle.
- Where your visitors are — traffic from the US, UK, and Australia usually earns more per click than traffic from India.
- Your total traffic volume.
- Placement and how engaged your readers are.
As a rough, honest illustration rather than a promise: a smaller tech blog with around 10K monthly visits from India might see somewhere in the ₹2,000–₹7,000/month range, while a blog pulling 50K monthly visits from the US could see meaningfully more. Your mileage will differ. Treat AdSense as one income stream among several — pairing it with affiliate marketing or an email list is where the real compounding happens.
Common mistakes to avoid
A few errors get sites rejected or even banned, so steer clear of these:
- Too many ads. It slows your site, hurts SEO, and annoys readers.
- Clicking your own ads. This is the fastest way to get your AdSense account banned — never do it, and don’t ask friends to either.
- Thin or copied content. Copyrighted or low-value content means near-instant rejection.
- Missing legal pages. No Privacy Policy is a common rejection reason.
- Ad-network conflicts. Misusing other ad networks before approval can cause problems.
Avoid those and you clear the bar most rejected applicants trip over.
After approval: how to actually improve your earnings
Getting approved is the start, not the finish. Once your ads are live, a few habits quietly separate blogs that earn a little from blogs that earn steadily.
Watch your reports for a couple of weeks before changing anything, so you’re reacting to real data rather than a hunch. Pay attention to which placements earn and which just add clutter, and cut the dead ones. Keep publishing — AdSense income scales with traffic, so the single biggest lever is almost always more useful content bringing more readers, not squeezing more ads onto the pages you already have.
It also helps to keep your site fast. Ads add weight, and a slow page loses both readers and ranking, which shrinks the very traffic your earnings depend on. A good caching setup and restraint on ad count protect the reader experience that makes the whole thing work. Done well, this is how you add Google AdSense to WordPress and see it grow over months rather than plateau in week one.
The honest bottom line on AdSense
Adding Google AdSense to WordPress is genuinely a no-code, three-step job: sign up, connect a plugin, choose sensible placements. The setup is the easy part. The part that actually determines whether you earn anything is everything around it — useful content, real traffic, and restraint with placements so you don’t sabotage the reader experience you worked to build.
Set it up cleanly, keep your ad count low, and let it run quietly in the background while you focus on what actually grows a blog: content people want to read. That’s how you add Google AdSense to WordPress in a way that helps your income without hurting your site.
add your website to Google Search Console– “speed up your WordPress website” → what is Answer Engine Optimization”
Frequently asked questions
Do I need to verify my WordPress site with code?
Not if you use Site Kit by Google — it handles verification automatically when you connect your Google account. That’s the main reason it’s the easiest option for beginners.
Can I use AdSense on a free WordPress.com blog?
No. You need a self-hosted WordPress.org site with your own domain and hosting. A free WordPress.com blog won’t qualify for a standard AdSense account.
How long does AdSense approval take?
Usually one to seven days, though it can stretch to about two weeks. A clean site with genuine content, legal pages, and Search Console indexing tends to be approved faster.
What if my site gets rejected?
Don’t panic — rejection is common and fixable. Improve your content, add or complete your legal pages (especially the Privacy Policy), make sure the site is indexed, and reapply after a couple of weeks.
Will adding AdSense slow down my site?
Slightly, since ads add scripts to load. Keep ad counts low and use a caching plugin like LiteSpeed Cache to protect your speed. A cluttered, ad-heavy page hurts both performance and earnings.
Want your blog set up to earn from day one?
I build fast WordPress sites with clean monetization, SEO, and the legal pages AdSense wants to see — so your site is ready to be approved and found in Google and AI answer engines.
⭐ Found this helpful? Add WhiteBalanceAI as your Google Preferred Source so my posts show higher in your results.
🌿 Want to see AEO in action?
Caloriematterss is my own food blog, built with AEO and GEO principles from the ground up — a live case study of the SEO/AEO/GEO system I use.
Visit Caloriematterss →🚀 Starting your first website?
The platform you begin on shapes your speed, security, and how little you have to fight with later. The one I use and recommend is Hostinger — simple enough for a non-technical owner, runs WordPress cleanly, and handles the hosting essentials so you don’t manage servers.
Start with Hostinger →Disclosure: this is an affiliate link. If you sign up through it, I may earn a small commission at no extra cost to you. I only recommend tools I actually use and trust.