
How to install an SSL certificate on WordPress for free (no code)
📌 Key Points
What you’ll learn: How to install an SSL certificate on WordPress for free, with no coding, using either Hostinger or Cloudflare.
The method: Flip on free SSL in your host’s dashboard (or route through Cloudflare with “Full” SSL), force HTTPS, then verify the padlock. About 10 minutes.
Why it matters: SSL removes the “Not Secure” warning, is required for AdSense and payments, and gives you a small Google ranking edge.
If your WordPress site still shows a “Not Secure” warning in the browser, this guide fixes it today — for free, with no code. I’ll show you how to install an SSL certificate on WordPress using either your host (Hostinger) or Cloudflare, and how to force everything over to HTTPS so that padlock finally appears.
When I launched WhiteBalanceAI, the tech settings overwhelmed me at first. But installing SSL turned out to be one of the easier jobs — done in about ten minutes without writing a single line of code. If I could do it as a non-technical beginner, you can too. Let’s secure your site step by step.
Table of Contents
What is an SSL certificate?
An SSL certificate (Secure Sockets Layer) protects the connection between your website and your visitors. It upgrades your URL from http:// to https:// and shows the padlock icon next to your domain in the browser.
Why it matters:
- It encrypts data like emails, passwords, and form entries so they can’t be intercepted.
- It’s required to get approved for AdSense and most payment gateways.
- Google gives a ranking preference to HTTPS sites.
- Without it, Chrome labels your site “Not Secure,” which scares visitors away.
In short, SSL isn’t optional anymore. It’s a baseline requirement for a site anyone is meant to trust. The good news is that you no longer need to buy an expensive certificate or hire anyone — you can install an SSL certificate on WordPress for free in a few clicks, which is exactly what the rest of this guide covers.
Why you must install an SSL certificate on WordPress
If you need convincing, here are five concrete reasons to install an SSL certificate on WordPress right away:
- It boosts SEO and signals trust to Google.
- It removes the “Not Secure” browser warning that drives people off your page.
- It protects login forms and any personal data visitors enter.
- It builds credibility for your brand — a padlock reads as professional.
- It’s essential for eCommerce, ads, and lead generation to work at all.
What you need before you start
To install an SSL certificate on WordPress, you’ll want:
- A working WordPress website.
- Access to your hosting dashboard (Hostinger, Bluehost, or similar).
- Optionally, a Cloudflare account for extra security and speed.
That’s it. Now here are the two free methods — pick whichever matches your setup.
Which method should you use?
Before you start, a quick decision so you don’t do more than you need. If your host includes free SSL — and most good ones now do — use Method 1. It’s the simplest, it’s managed for you, and there’s nothing extra to configure. You only need Method 2 (Cloudflare) if your host genuinely doesn’t offer free SSL, or if you also want Cloudflare’s speed and security benefits on top. There’s no prize for doing both, and layering them carelessly is actually a common cause of the redirect-loop error covered later. Pick the one route that fits your setup and stop there.
How to install an SSL certificate on WordPress ?
Method 1: Install SSL via your host (Hostinger — free and fast)
If you host on Hostinger, SSL is included on every plan at no extra cost, and this is the simplest route.
Step 1: Open your hosting dashboard. Log in to Hostinger, then click Websites → Manage beside your domain. Scroll to the Security area and find the SSL section.
Step 2: Activate the free SSL. Under the SSL tab you’ll see a free Let’s Encrypt SSL option. Click Install SSL and wait roughly 5–10 minutes for it to provision.
Step 3: Force HTTPS. Once SSL is active, return to the SSL section and toggle Force HTTPS → ON. Your site will now load over https:// with the padlock showing.
That’s the whole process on Hostinger. Most quality hosts (Bluehost, SiteGround, and others) offer a nearly identical free-SSL toggle in their dashboards, so if you’re elsewhere, look for the SSL section in your host’s security settings first.
Method 2: Use Cloudflare (if your host doesn’t offer free SSL)
If your host doesn’t include free SSL, Cloudflare gives you one and speeds up your site as a bonus.
Step 1: Sign up for Cloudflare. Go to Cloudflare, create an account, and add your domain.
Step 2: Update your nameservers. Cloudflare gives you two nameservers. Log into your domain registrar (GoDaddy, Namecheap, etc.) and replace your existing nameservers with Cloudflare’s. This change can take a few hours to propagate.
Step 3: Turn on SSL — the right setting. In your Cloudflare dashboard, go to SSL/TLS → Overview and choose Full (or Full (strict) if your server already has a valid certificate). Avoid the Flexible option — it only encrypts the connection between the visitor and Cloudflare, leaving the link to your server unencrypted, which isn’t truly secure. Then enable Always Use HTTPS so every visitor is redirected to the secure version.
Full or Full (strict) is the correct modern choice. Flexible was common in old tutorials but is no longer recommended.


Redirect HTTP to HTTPS in WordPress
After you install an SSL certificate on WordPress, some old links may still point to http://. Here are two easy ways to fix that.
Option 1: Really Simple SSL plugin (easiest). Go to Plugins → Add New, search Really Simple SSL, install and activate it. It auto-detects your certificate and handles all the redirects and mixed-content fixes for you. For most beginners this is the one-click answer.
Option 2: Update your WordPress URLs manually. Go to Settings → General, change both the WordPress Address and Site Address to https://yourdomain.com, and save. You’ll be logged out and can sign back in over HTTPS.
Verify your SSL is working
Once installed, confirm it’s actually live:
- Open your site in Chrome or Firefox and look for the padlock icon next to your domain. That means the connection is secure.
- For a deeper check, use a free tool like SSL Shopper’s SSL Checker — enter your domain with
https://and it confirms the certificate is properly installed and recognised globally.
This quick check ensures the certificate is valid everywhere, not just in your own browser cache.
Add your HTTPS site to Google Search Console
Once secure, re-verify the HTTPS version of your domain in Google Search Console so Google tracks the right version:
- Open Search Console and click Add Property.
- Enter the HTTPS version of your domain.
- Verify using the HTML tag or DNS method.
This makes sure your secure site is the one being indexed and measured, not the old http:// version.
Common SSL issues and how to fix them
A few problems tend to show up right after installing SSL. Each has a simple fix:
- Mixed content warning. Some elements still load over HTTP. Install Really Simple SSL to auto-rewrite those insecure links.
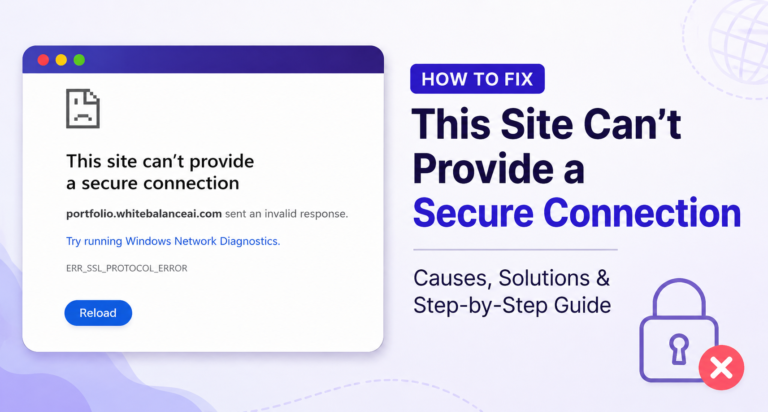
- Site still shows “Not Secure.” Usually DNS hasn’t finished updating, or your browser cached the old version — wait a bit and clear your cache.
- Redirect loop error. Don’t force HTTPS in two places at once (for example both Cloudflare and
.htaccess). Pick one method and disable the other.
Work through those and the last stubborn warnings clear up quickly.
After SSL: a few things worth doing
Once you install an SSL certificate on WordPress and the padlock is showing, a handful of small follow-ups keep it working smoothly and protect the SEO value you just gained.
Update any hard-coded internal links or images that still use http:// — the Really Simple SSL plugin catches most, but if you pasted full http:// URLs into old posts, search and update those so you don’t trigger mixed-content warnings. Point your other tools at the HTTPS version too: update the URL in Google Analytics, in any sitemap settings, and anywhere you’ve listed your site (social profiles, business listings) so everything agrees on the secure address.
It’s also worth setting a reminder about renewal. Free Let’s Encrypt certificates renew automatically on most hosts and via Cloudflare, so you usually don’t touch anything — but it’s good to know your certificate has an expiry and that auto-renewal is handling it. If you ever see a “certificate expired” warning, that’s the auto-renewal failing, and your host’s support can fix it quickly.
None of this is urgent or technical. It’s just tidying up so the secure version of your site is the one everyone — visitors, Google, and your own tools — treats as canonical.
The bottom line
Installing an SSL certificate on WordPress is genuinely a ten-minute, no-code job: flip the SSL toggle in your host (or route through Cloudflare), force HTTPS, add a redirect plugin if needed, and verify the padlock. It’s one of the highest-value things you can do for a new site — it protects your visitors, satisfies Google, and unlocks ads and payments.
Don’t leave it for later. A secure site is the foundation everything else — SEO, monetization, trust — is built on. Get the padlock up today and move on with confidence.
speed up your WordPress website” → add your website to Google Search –fix common WordPress errors”
Frequently asked questions
Is an SSL certificate free with WordPress?
WordPress itself doesn’t provide SSL — your host does. Most quality hosts now include a free Let’s Encrypt certificate on every plan, and Cloudflare offers a free option too. You rarely need to pay for basic SSL anymore.
What’s the best plugin to install SSL on WordPress?
Really Simple SSL is the most beginner-friendly option. It auto-detects your certificate, forces HTTPS, and fixes mixed-content warnings with essentially one click — no manual configuration needed.
Can I install SSL manually via .htaccess?
You can, but it’s not recommended for beginners — a small mistake in that file can break your site. Use your host’s SSL toggle or the Really Simple SSL plugin instead; both are safer and faster.
How long does SSL take to activate?
Usually 5–15 minutes once you install it. If you changed nameservers (as with Cloudflare), full DNS propagation can take up to 24 hours, so give it time before assuming something went wrong.
Do I need SSL if I’m not collecting payments?
Yes. Google flags non-HTTPS sites as “Not Secure” regardless of whether you take payments, and that warning costs you trust and traffic. Every site should have SSL, not just eCommerce ones.
⭐ Found this helpful? Add WhiteBalanceAI as your Google Preferred Source so my posts show higher in your results.
🌿 Want to see AEO in action?
Caloriematterss is my own food blog, built with AEO and GEO principles from the ground up — a live case study of the SEO/AEO/GEO system I use, hosted on Hostinger with free SSL.
Visit Caloriematterss →🚀 Starting your first website?
The platform you begin on shapes your speed, security, and how little you have to fight with later. The one I use and recommend is Hostinger — it includes free SSL on every plan, runs WordPress cleanly, and handles the hosting essentials so you don’t manage servers.
Start with Hostinger →Disclosure: this is an affiliate link. If you sign up through it, I may earn a small commission at no extra cost to you. I only recommend tools I actually use and trust.
Want your site secured and set up properly?
I handle SSL, speed, security, and SEO so your WordPress site is safe, fast, and ready to be found in Google and AI answer engines — no tech stress on your side.


2 Comments
Comments are closed.