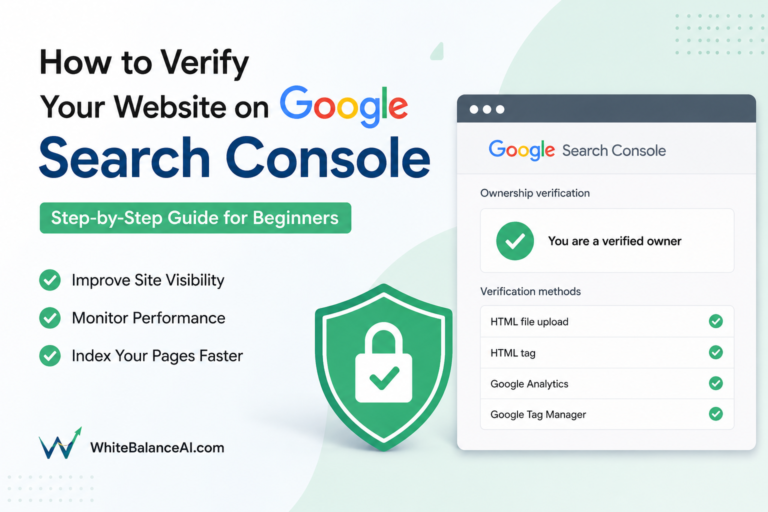
How to Upload Google HTML Verification File in WordPress (Without Plugin)
📌 Key Points
The problem: Google Search Console gives you an HTML verification file and vague instructions to “upload it to your site” — with no idea where it goes.
The fix: Download the file, upload it (unrenamed) to your public_html folder via File Manager, and click Verify. No plugin, no code, under ten minutes.
Who it’s for: Beginner and non-technical WordPress owners verifying a site in Google Search Console for the first time.
How to Upload Google HTML Verification File in WordPress ?- this was a main question when i was trying to verifying my sites first time in Google search console . I was terrified to saw the html , as non coder ,I was like what is this . How i do this ? Then I learned the process now sharing with the person ,who will learn from this .
if Google Search Console has just handed you a file with a name like google123abc.html and told you to “upload it to your site,” and you have no idea where that file is supposed to go, this guide is for you. I’ll show you how to upload the Google HTML verification file in WordPress without installing a single plugin — the clean way I use on my own sites.
I did this myself on Hostinger with WordPress, and the whole thing took under ten minutes. No code you need to understand, no third-party plugin cluttering your site. Just a file, a folder, and a Verify button. Let me walk you through it.
Table of Contents
How to Upload Google HTML Verification File in WordPress ?
When you add your site to Google Search Console, Google needs proof that you actually own it. It offers a few ways to prove that, and one of them is the HTML file method.
The Google HTML verification file is a small, unique file Google generates just for your site. You download it and upload it to your website’s root directory — the top-level folder where WordPress lives. When Google visits your site and finds that exact file sitting where it expects, it accepts that you’re the owner and unlocks Search Console for you.
That’s the whole concept. It’s less a technical hurdle and more a handshake: Google says “prove it’s yours,” and this file is your proof.
Why upload the file instead of using a plugin?
Plenty of guides tell you to verify through a plugin like Rank Math or Yoast, and that route does work. But I prefer the direct file-upload method for a few honest reasons:
- It keeps your site lighter. Every plugin adds a little weight and another thing that can break. Verifying with a file means you’re not depending on a plugin for something this important.
- It doesn’t silently reset. Plugin settings can be overwritten during updates or theme changes. A file you uploaded stays exactly where you put it until you delete it yourself.
- It works everywhere. Some hosting setups don’t play nicely with plugin-based verification. A file upload works on essentially any host with a File Manager or FTP.
If you want a cleaner, more durable verification that you fully control, uploading the Google HTML verification file is the method I’d point you to.
What you’ll need before you start
This is a short list, and you probably have all of it already:
- A Google Search Console account (free).
- Access to your hosting panel — Hostinger, cPanel, or similar.
- Access to your WordPress site.
- About ten minutes.
That’s it. Now let’s do it step by step.
Steps For “How to Upload Google HTML Verification File in WordPress ?”
Step 1: Add your property in Google Search Console
Open Google Search Console and start the verification:
- Click Add Property.
- Choose the URL prefix option.
- Enter your full website URL, including the
https://part. - Click Continue.
Google will now show you a list of verification methods.
Step 2: Download the HTML verification file
From the list of methods, pick HTML file:
- Click Download on the HTML file Google offers.
- Save it somewhere you’ll find it again — it’ll have a name like
google123456789abc.html. - Do not rename it. The filename is part of how Google identifies your site. Rename it and verification fails.
Keep that file handy. Next you’ll put it where Google can find it.
Step 3: Open your hosting File Manager
For this walkthrough I’m using Hostinger, but cPanel works the same way:
- Log in to your hosting dashboard (Hostinger, cPanel, etc.).
- Go to Files → File Manager.
- Open the public_html folder.
public_html is your website’s root directory — the top-level folder that holds your WordPress installation. This is exactly where the Google HTML verification file needs to live, not inside a theme folder or a subfolder.
Step 4: Upload the file to public_html
With public_html open:
- Click the Upload button in your File Manager.
- Select the Google HTML verification file you downloaded.
- Let it finish uploading. It should now appear in the list alongside your other WordPress files.
To confirm it uploaded correctly, open a new browser tab and visit:
yourdomain.com/google123456789abc.htmlSwap in your real domain and your real filename. If the file’s contents open in the browser instead of a “not found” page, it’s in the right place and you’re ready to verify.
Step 5: Go back to Search Console and click Verify
Return to the Google Search Console tab where you left off and click Verify. Google checks for the file, finds it, and verifies your site — usually in seconds. That’s the confirmation that the Google HTML verification file did its job.
Congratulations — you’ve verified your site with no plugin, no code you had to write, and nothing that can quietly reset later.
Should you delete the file after verification?
Technically you can remove it once you’re verified. But I’d leave it in place, and here’s why: Google may re-check for the file from time to time to confirm you still own the site. If you delete it and later switch themes, migrate hosts, or need to re-verify, that file being gone can cost you your verification. It’s a tiny file doing no harm — leaving it there saves you a future headache.



What about subdomains and multiple versions?
If you’re verifying a subdomain like blog.yourdomain.com, follow the same steps, but upload the file into the root folder of that specific subdomain rather than the main public_html.
And if your site has several versions in Search Console — http, https, www, and non-www — you may need to verify each one it treats as a separate property. Uploading the file to the root directory usually covers the variations that share it, but check each property shows as verified.
Troubleshooting: common verification errors
If verification doesn’t go through on the first try, it’s almost always one of these, and each has a simple fix:
- “File not found.” The file went into the wrong folder. It must sit directly inside
public_html, not in a subfolder or theme directory. - Verification failed. The file was renamed. Delete it, download a fresh copy from Search Console, and upload it without changing the name.
- 403 error when you visit the file. A file-permission issue. Set the file’s permissions to
644in your File Manager. - The file URL redirects to your homepage. It was uploaded to the wrong directory, or a redirect rule is catching it. Double-check the folder path is
public_html.
Work through those in order and the vast majority of verification problems clear up straight away.
Why this method is more secure for long-term SEO
Beyond being simple, the file-upload approach is genuinely more durable than plugin-based verification. Plugin settings can be reset or overwritten by an update; a file you placed yourself stays untouched until you choose to remove it. That means fewer surprise “your site is no longer verified” emails months down the line. For a long-term SEO setup, that stability is worth having.
What you unlock once you’re verified
Verifying isn’t just a checkbox — it’s the door to everything Search Console offers. Once your site is verified, you get:
- Performance data: the clicks, impressions, and search queries bringing people to your site.
- Indexing control, so you can ask Google to crawl new or updated pages.
- Page experience and Core Web Vitals insights.
- Alerts when Google spots SEO or indexing issues on your site.
Most importantly, verification is you telling Google “I own this site” — which is the first real step toward ranking and understanding how you’re performing in search.
What if file upload isn’t an option? The meta-tag alternative
Occasionally you’ll be on a managed host that doesn’t give you File Manager or FTP access, and uploading the Google HTML verification file simply isn’t possible. You’re not stuck — Google offers a couple of fallbacks.
The most common is the HTML meta-tag method. Instead of a file, Google gives you a small snippet of code to paste into your site’s <head> section. On WordPress you can add it through your theme’s header settings or a lightweight header-and-footer plugin, and it verifies ownership the same way. The DNS-record method is another option: you add a TXT record at your domain registrar, which is handy when you want to verify at the domain level across every version of your site at once.
I still reach for the Google HTML verification file first when I have file access, because it’s the most self-contained and predictable. But it’s good to know the alternatives exist for the setups where the file route is closed off.
Final thoughts about How to Upload Google HTML Verification File in WordPress ?
If you’re nervous about breaking your site, this is the method I’d recommend precisely because it’s hard to get wrong. There’s no plugin to misconfigure and no third-party access to hand out. You download one file, drop it in one folder, and click one button. Learn to upload the Google HTML verification file this way once, and you’ll never be intimidated by Search Console verification again.
Install a free SSL certificate on WordPress” → honest hosting comparison for bloggers in India
Want your setup done for you?
If Search Console, hosting, and a clean WordPress setup feel like more than you signed up for, I get your site verified, secured, and ready to be found in Google and AI answer engines.
Frequently asked questions
What is a Google HTML verification file?
It’s a unique HTML file that Google Search Console generates to confirm you own your website. You upload it to your site’s root directory, and once Google finds it there, it verifies your ownership and unlocks Search Console.
Where exactly do I upload the file in WordPress?
Into the public_html folder — your website’s root directory — using your hosting File Manager or an FTP client. Don’t put it in a theme folder or a subfolder, or Google won’t find it.
What if I can’t upload files to my site?
Use an alternative verification method instead — adding a meta tag to your site’s head section, or verifying through a DNS record. Both prove ownership without needing File Manager access.
Can I delete the verification file after verifying?
It’s best to leave it in place. Google may re-check for it periodically to confirm you still own the site, so deleting it can cost you your verification if you later migrate or switch themes.
Why did my verification fail even after uploading?
The most common causes are renaming the file, uploading it to the wrong folder, or a permissions issue. Keep the original filename, place it directly in public_html, and set permissions to 644 if you hit a 403 error.
⭐ Found this helpful? Add WhiteBalanceAI as your Google Preferred Source so my posts show higher in your results.
🌿 Want to see AEO in action?
Caloriematterss is my own food blog, built to rank in AI search and traditional search at the same time. It’s a live case study of the SEO/AEO/GEO system I use.
Visit Caloriematterss →🚀 Starting your first website?
The host you begin on shapes your speed, security, and how little you have to fight with later. The one I use and recommend is Hostinger — simple enough for a non-technical owner, runs WordPress cleanly, and handles the hosting essentials so you don’t manage servers.
Start with Hostinger →Disclosure: this is an affiliate link. If you sign up through it, I may earn a small commission at no extra cost to you. I only recommend tools I actually use and trust.