What is GEO and How to Do Generative Engine Optimization (2026 Guide)
📌 Key Points
- Generative Engine Optimization (GEO) helps your content get cited by AI-powered search engines and assistants.
- Create clear, authoritative content that directly answers real user questions.
- Use structured data, logical headings, and strong internal linking to improve AI understanding.
- Build topical authority with accurate, well-organized, and regularly updated content.
- Combine GEO with SEO and AEO for the best visibility across Google Search and AI platforms.
What Generative Engine Optimization Actually Means
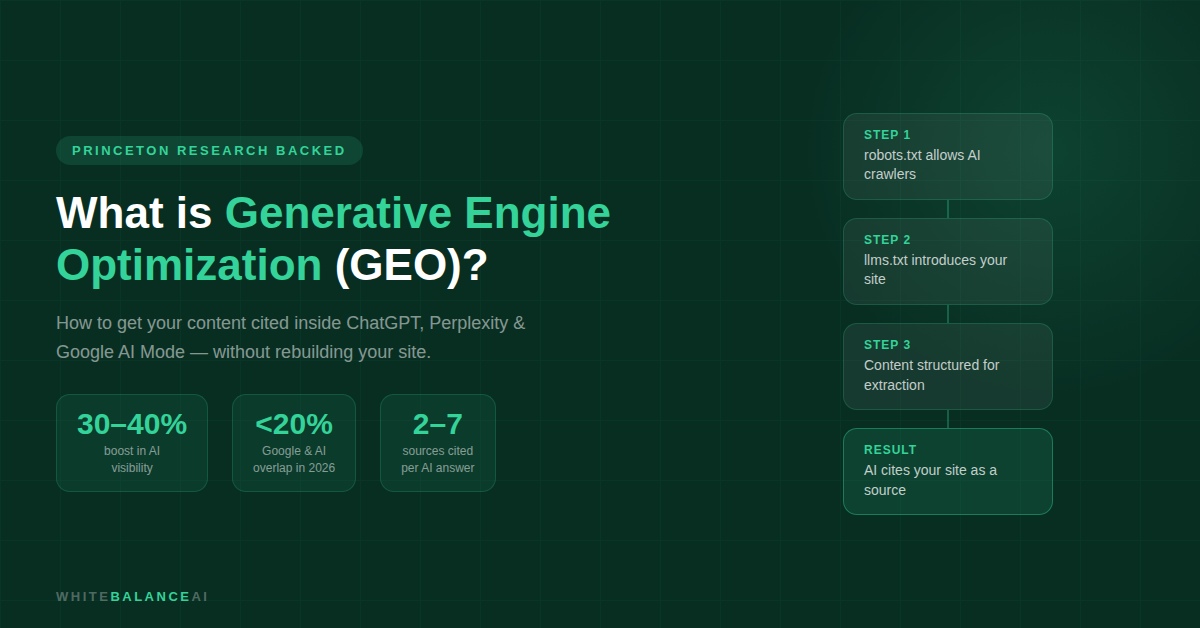
Generative engine optimization — GEO — is the process of structuring your content and online presence so that AI-powered platforms retrieve it, cite it, and reference it when generating answers for users.
When a potential client asks Perplexity “what does an AI automation freelancer actually do,” GEO determines whether your site appears in that answer. When someone asks Google’s AI Mode “best tools for WhatsApp chatbots for small business,” generative engine optimization is why one blog post gets named and another doesn’t — even if they rank the same in traditional search.
A Princeton University study found that generative engine optimization techniques can boost content visibility in AI-generated responses by 30 to 40%. That’s not a small difference.
Here’s what most guides leave out: ranking on page one of Google no longer guarantees you appear in AI answers. Research shows the overlap between top Google results and AI-cited sources has dropped from 70% to below 20% in 2026. Traditional SEO and generative engine optimization are now two different games. You need to play both.
Table of Contents
How Generative AI Engines Decide What to Cite
When someone asks an AI a question, the engine breaks it into smaller sub-queries and searches for each one separately. For each piece, it finds the most relevant and clearly structured content it can. It checks how authoritative the source looks, how current the information is, and how easy the content is to extract. Then it combines everything into one coherent answer and picks which sources to name.
Generative engine optimization targets every stage of that process — getting retrieved, getting extracted cleanly, and getting cited in the final output.
How to Do Generative Engine Optimization: The Practical Steps
Step 1 — Structure every section so it can stand alone
The biggest difference between content that gets cited and content that doesn’t is extractability. AI engines pull specific sentences and sections — they don’t read your post from top to bottom and absorb it like a reader would.
Every section of your content needs to make sense on its own. The heading states the topic. The first sentence answers it. The following sentences support it. A reader who lands anywhere mid-page should understand exactly what that section is about without reading everything before it.
This is the foundation of generative engine optimization.
Step 2 — Add real statistics and cite your sources
Research consistently identifies three content elements that improve citation rates in generative engine optimization: statistics, cited sources, and references to credible experts.
AI engines are trying to produce trustworthy answers. When your content includes a specific statistic with a named source — “a Princeton study found GEO techniques increase visibility by 30 to 40%” — it looks like the kind of source an AI can safely cite. When your content says “experts suggest” without attribution, it looks like filler.
Go through your existing posts. Find every vague claim. Replace it with a specific stat or a named reference. This single habit meaningfully improves your generative engine optimization without requiring a full rewrite.
Step 3 — Build topic clusters, not just individual posts
AI engines don’t just evaluate individual posts. They evaluate how much a domain knows about a topic. A site with one post about WhatsApp chatbots looks like a generalist. A site with eight interlinked posts covering chatbot setup, chatbot scripts, chatbot tools, chatbot integrations, and chatbot mistakes looks like an authority.
For generative engine optimization, topical authority matters more than it ever did for traditional SEO. Pick three to five core topics relevant to your business. Write a definitive guide on each. Build supporting posts around each guide. Link them all together with internal links.
Step 4 — Get your brand mentioned on other sites
AI engines don’t just crawl your own site. They look at signals from across the web — mentions in other blogs, press coverage, guest posts, directory listings, and reviews.
Practical steps: write guest posts on relevant industry blogs, answer questions on Reddit threads or Quora in your niche, list your business in industry directories, and collect reviews on Google Business Profile or Clutch.
Every genuine external mention of your brand associated with your topic area is a generative engine optimization signal.
Step 5 — The Three Files That Give AI Engines Access to Your Site
This is the step that separates websites that get cited from websites that get ignored entirely — and almost nobody talks about it.
Before any AI tool reads a single word of your content, it checks three things: whether it’s allowed to crawl your site, whether you’ve given it a structured introduction to your site, and how your content is organised. Three files control all of this.
File 1: robots.txt — Who Can Read Your Site
Your robots.txt file sits at yoursite.com/robots.txt and controls which bots are allowed to read your website. Many WordPress sites accidentally block AI crawlers in this file — which means ChatGPT, Perplexity, Claude, and Google’s AI Mode can never read your content, regardless of how good your generative engine optimization work is.
To check yours: type yoursite.com/robots.txt into your browser. If you see “Disallow: /” under any of the AI bot names, that bot is blocked.
To fix it: go to hPanel → File Manager → public_html → open robots.txt → make sure it includes Allow: / for the following bots:

File 2: llms.txt — Your Site’s Introduction to AI
llms.txt is a plain text file that lives at yoursite.com/llms.txt. It’s written specifically for AI systems — Google’s traditional crawler ignores it completely, but ChatGPT, Perplexity, Claude, and similar tools look for it.
Think of it as your website introducing itself to every AI tool that visits. It tells them what your site covers, who runs it, and which pages are most important. Without it, AI systems have no structured way to understand your site — they’re reading individual pages without any context about who you are or what you specialise in.
Add it through hPanel: File Manager → public_html → right-click → Create New File → name it llms.txt → paste your content → save.
A simple llms.txt for a service business or freelancer looks like this:

File 3: llms-full.txt — The Detailed AI Reference
llms-full.txt is the extended version. Where llms.txt gives AI a quick overview, llms-full.txt gives a detailed summary of every key page on your site — what each post covers, what question it answers, and why it’s useful.
This is the file that directly supports generative engine optimization. When an AI is trying to decide which source to cite for a specific question, having a detailed, accurate description of each of your posts in llms-full.txt gives you a significant advantage over sites that don’t have one.
Add it the same way as llms.txt — at yoursite.com/llms-full.txt. Format each post entry like this:

The more accurately and specifically you describe each post, the more useful this file is for generative engine optimization.
Step 6 — Write content only you can write
Google’s May 2026 guide names this directly: generic summaries that AI can generate itself add no citation value. Only content that reflects genuine expertise, original research, or first-hand experience earns inclusion.
For a solo freelancer or small business owner, this means writing from what you actually know. A post about setting up a WhatsApp chatbot that includes real client results, real friction points you hit, and real lessons you learned will consistently outperform a polished generic overview. Generative engine optimization rewards specificity and lived experience — which is exactly what large content farms can never replicate.
You may also like these . 17 Latest Gadgets In That Are Changing The Way We Live
7 Steps To Do Google Search Console Site Verification
Frequently Asked Questions
What is Generative Engine Optimization (GEO)?
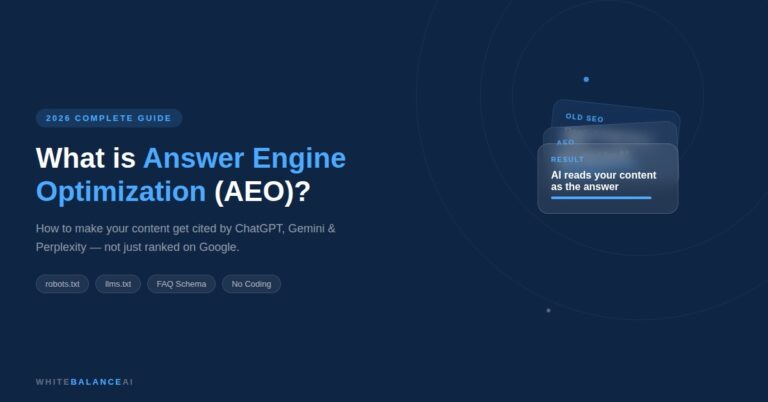
Generative Engine Optimization (GEO) is the practice of optimizing content so AI-powered search engines and assistants can understand, reference, and cite your website when generating answers for users.
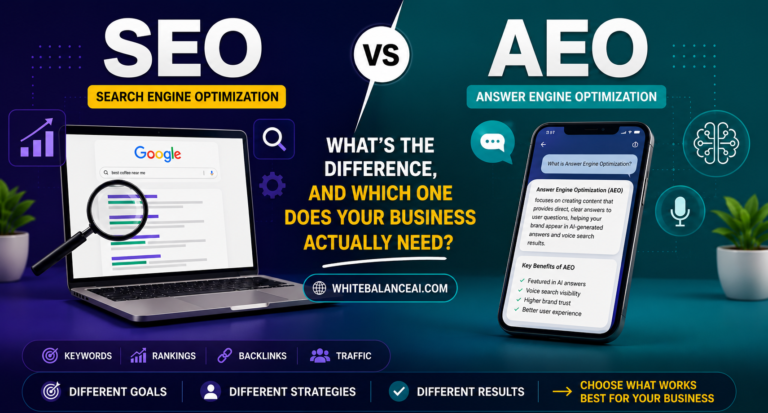
How is GEO different from SEO?
SEO focuses on improving rankings in traditional search engines, while GEO focuses on making your content understandable and trustworthy enough for AI models to reference in generated responses.
Does GEO replace SEO?
No. GEO complements SEO. A strong SEO foundation combined with AI-friendly content, structured data, and topical authority gives your website the best chance of being discovered by both search engines and AI assistants.
What helps a website perform better in AI search?
Clear answers, well-structured headings, schema markup, internal linking, authoritative content, and regular updates all help AI systems understand and reference your website more effectively.
Should every business care about GEO?
Yes. As AI-powered search continues to grow, businesses that optimize for GEO alongside SEO and AEO are better positioned to increase visibility, build authority, and reach customers across modern search experiences.
⭐ Found this helpful? Add WhiteBalanceAI as your Google Preferred Source so these WordPress guides show up more often for you. Set WhiteBalanceAI as a preferred source →
🚀 Starting your first website?
The platform you begin on shapes your speed, security, and how little you have to fight with later. The one I use and recommend is Hostinger — simple enough for a non-technical owner, runs WordPress cleanly, and handles the hosting essentials so you don’t manage servers.
Start with Hostinger →Disclosure: this is an affiliate link. If you sign up through it, I may earn a small commission at no extra cost to you. I only recommend tools I actually use and trust.
🌿 Want to see AEO in action?
Caloriematterss is a real-world niche food blog built with AEO (Answer Engine Optimization) and GEO (Generative Engine Optimization) principles from the ground up. Explore how structured recipes, FAQ schema, internal linking, and AI-friendly content work together in a live website.
Visit Caloriematterss →

2 Comments